Torgon’s Ride Builder is a system that enables you to build your very own roller coasters and other path type rides using no-lag keyframing.
FULL VERSION: You can have hundreds of waypoints to make your path as detailed as you like.
DEMO VERSION: You can have up to 10 waypoints.
Let’s take a look at the basics and how it works. Then we’ll look at the Menu.
Quickstart
Below, we first take a short tour through the basics, before the manual gets to a description of all menu options.
Setup
What’s in the box?
Torgon’s Ride Builder (This is the system controller and will be called the controller in this text.)
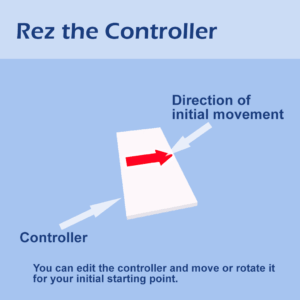
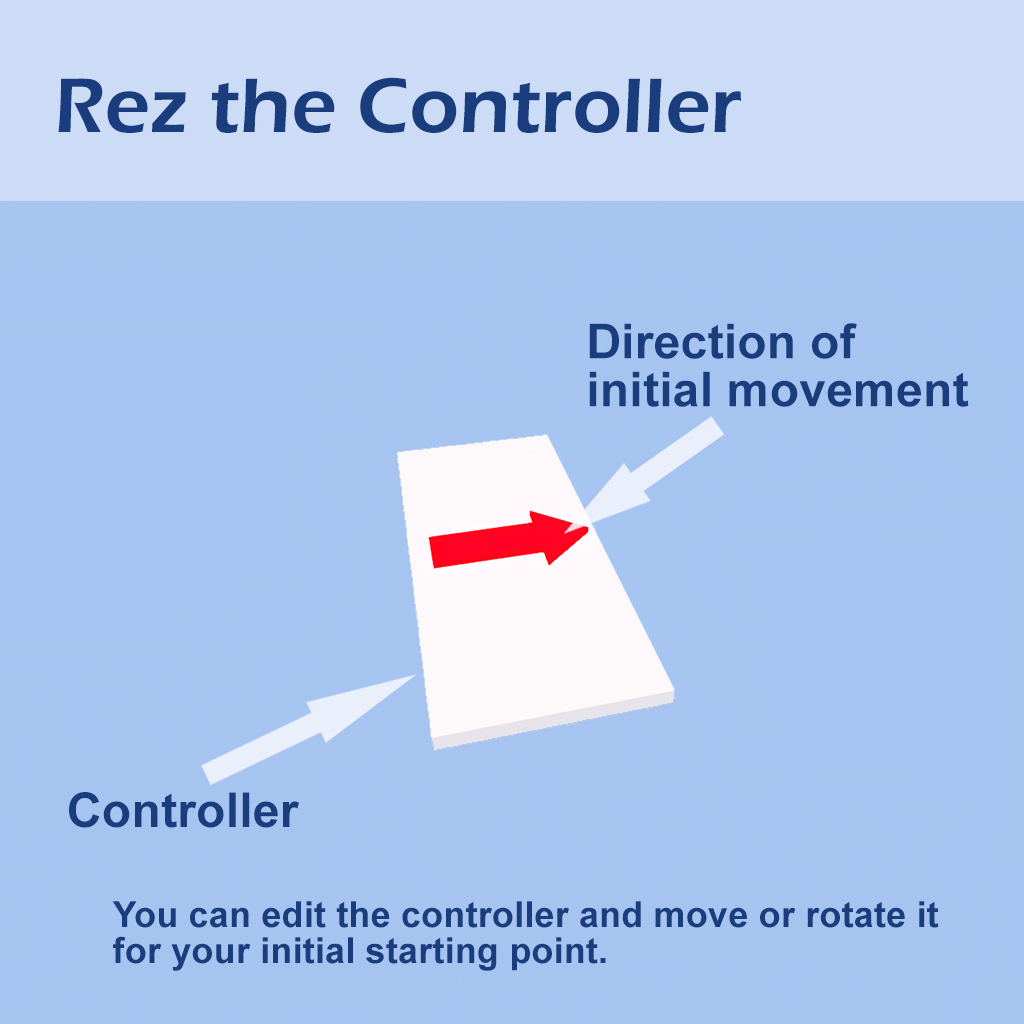
Rez the controller.
Pick a spot you want to be the starting point of your ride and rez the controller.
It controls the rest of the building process
The direction of the red arrow is the initial direction of the ride movement.
If you need to move or rotate it, edit it and move it with the SL edit tools.
Any keyframe movement is relative to the controller. If you move it later, you won’t just move the controller, but the full path your ride vehicle is taking!
First Test
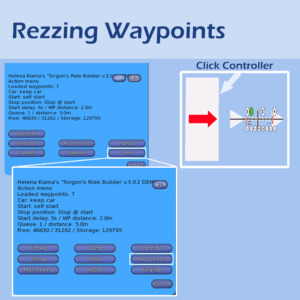
After rezzing the controller, click it to get its menu.
Select “Rez mover”, which brings up a simple two seater vehicle.
Sit on the vehicle.
It’ll take you around an invisible path and then back to the start.
The controller comes preconfigured with a very simple path.
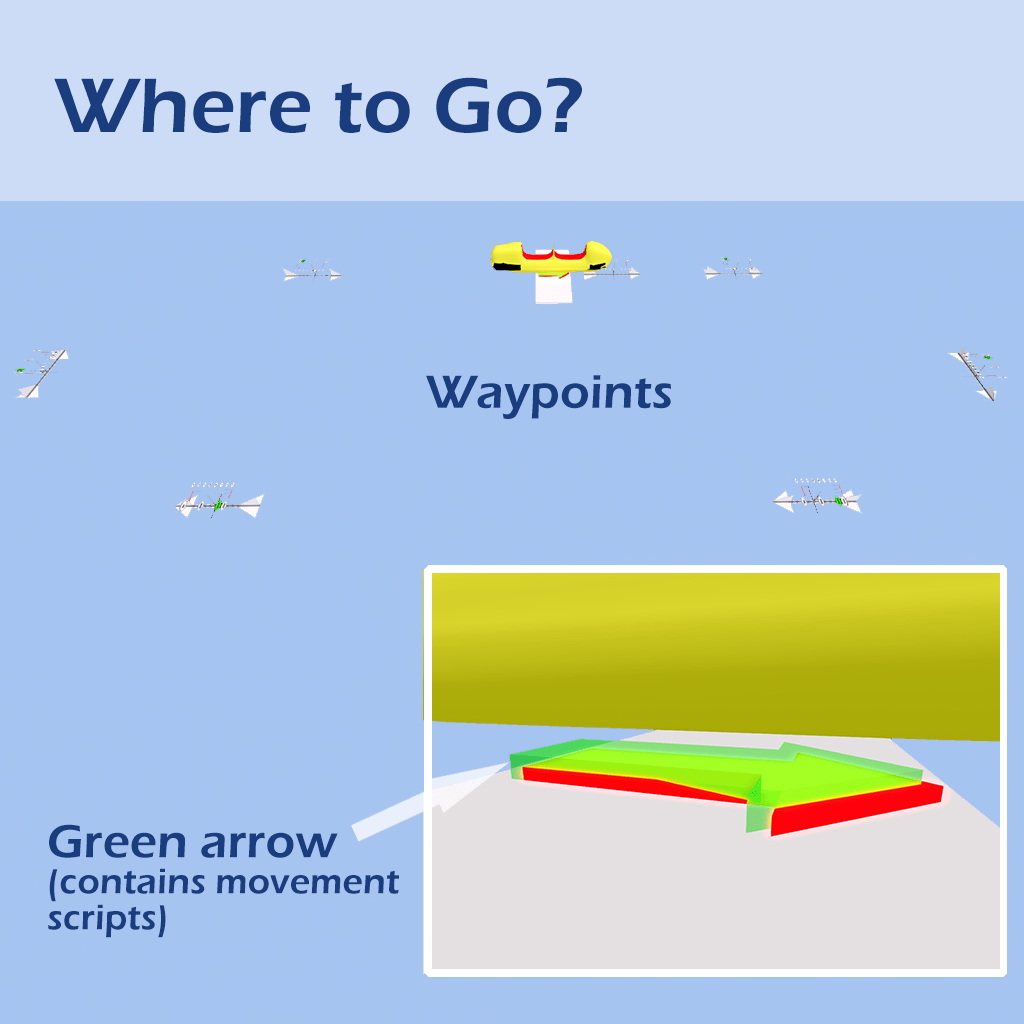
How does it know where to go?
If you look closely, you can see a translucent green arrow under the ride vehicle. This green arrow is always centered on the controller and contains the main movement scripts.
When you build out your ride in the future, the arrow will follow the waypoints you lay out and is basically the part that keeps your ride “on track”. In a finished ride, you should make the green arrow invisible.
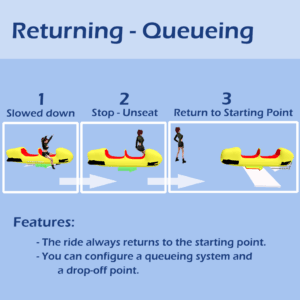
Returning to starting point and queueing
Near the end of the ride the vehicle:
slowed down
stopped and unseated you
returned to starting point
That was to show two features:
How the ride always returns to the starting point even if you don’t lay out the last waypoints
You can configure a queueing system and a drop-off point.
Its all about the waypoints!
So you have a moving ride now, but you don’t see anything at all. How does it know what track to use?
Making waypoints visible:
Click the controller to get the menu.
Choose Tools -> Rez points. The controller will rez the 7 waypoints used to create the circle path you took.
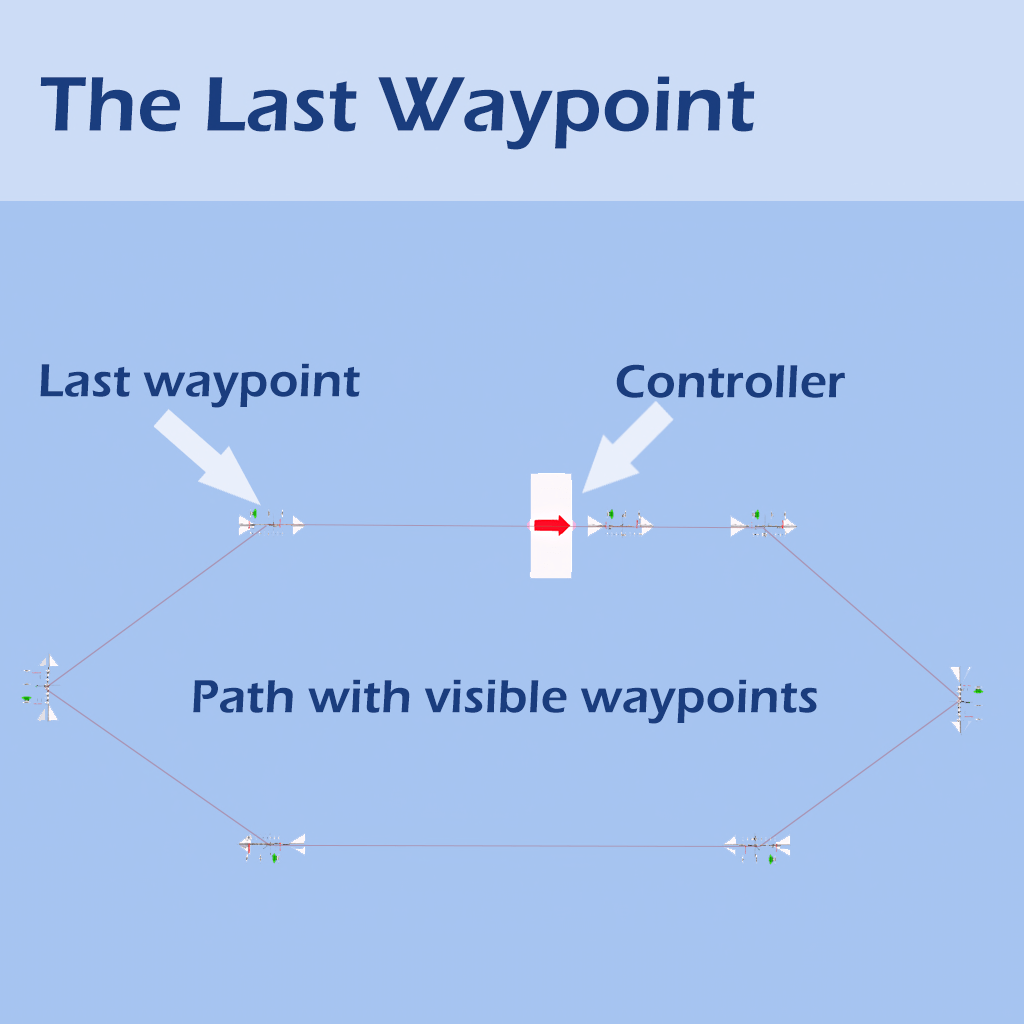
The last waypoint
You can see that the last waypoint is a bit “behind” the controller.
That is the waypoint where the ride slowed down a lot, to its default speed of 2 meters/second, to travel to the drop-off point.
Please note: The drop-off point is not visible, but calculated, based on a distance you can change in the settings “Queue meter”
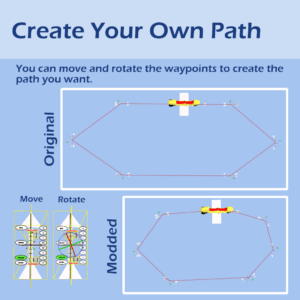
Create your own path
Now that the first waypoints are rezzed, you can play with them to see what happens:
Move and rotate them around a bit using the SL edit tools.
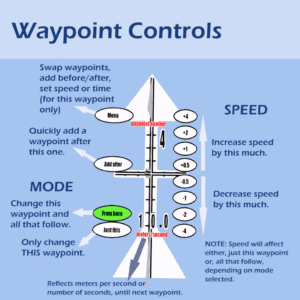
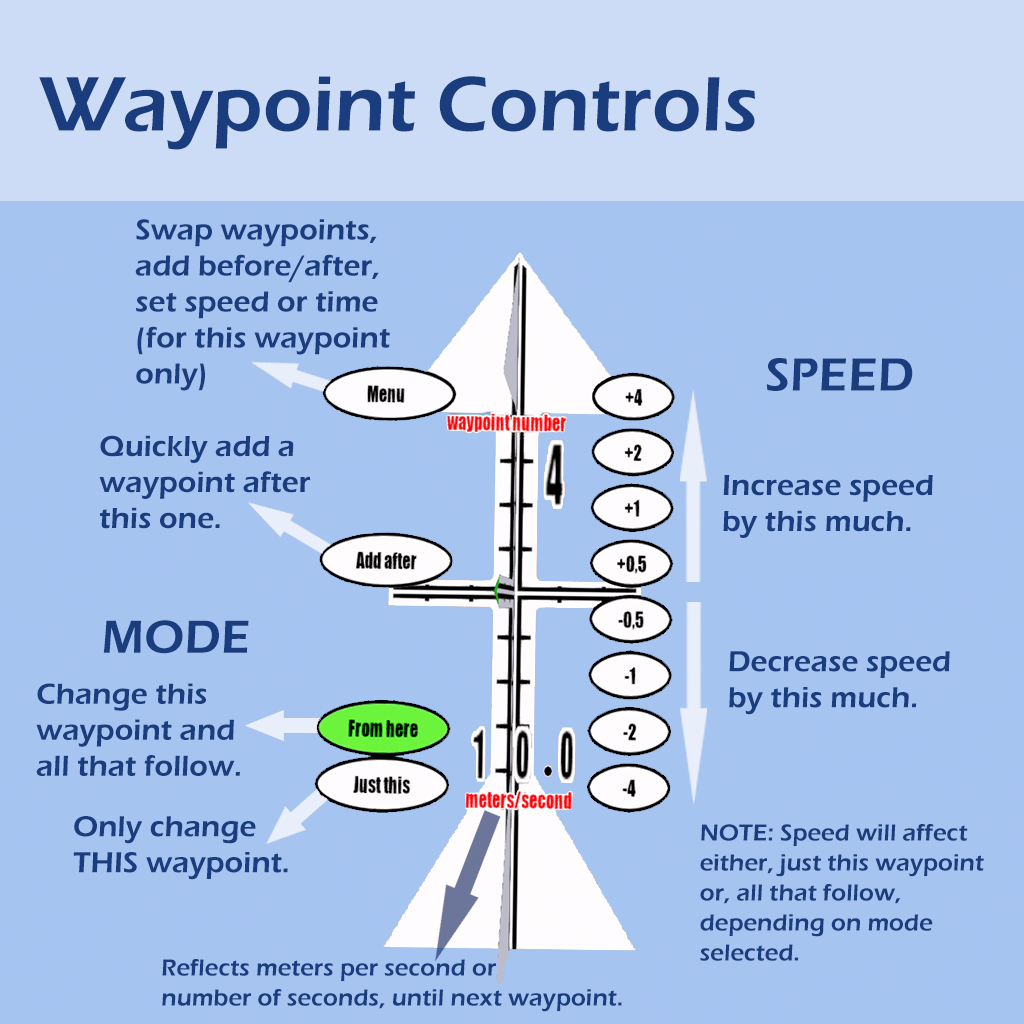
Speed: The initial speed for all waypoints is initially set to 10.
Via menu (on the waypoint): Click Menu -> Speed -> Select a number. (PLEASE NOTE, changes via menu affect ONLY the current waypoint and no others.)
Via number buttons: Click a number on the waypoint to speed up or slow down current speed using the following modes:
FROM HERE: All waypoints from here going forward.
JUST THIS: Just this waypoint.
When finished editing the waypoints, click the controller again and select “Detect.”
The controller will then check and recalculate all waypoints and transfer the updated path to your ride vehicle. (This process takes a few seconds.)
If you build your own roller coaster, these waypoints should be aligned with your track. the closer to it the better. For now, just play with them.
You can find an “Add after” button on the waypoints, thats the way you add more points for a more detailed track. The system can handle hundreds, so don’t be stingy. (The DEMO only goes up to 10 waypoints.)
You can also swap waypoints via the menu.
Waypoints, or no waypoints? Cleanup
The waypoints are not required for your ride to run and follow the path you set up. Your edited path stays in the controller’s memory once you selected “Detect.”
This helps with keeping the LI count of your ride to a minimum.
To get rid of the waypoints:
Click the controller for the menu.
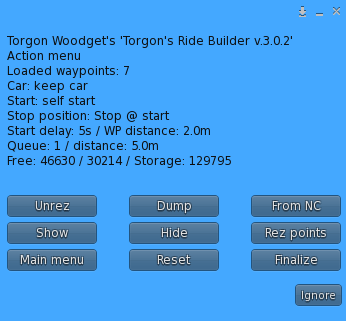
Choose Tools -> Unrez.
To get the waypoints back:
Click the controller for the menu.
Choose Tools -> Rez points.
NOTE: If you happen to use Tools -> Reset, it will clean the controller’s memory and you won’t be able to get your waypoints back.
If LI count is not an issue, or you just want to hide the waypoints but keep them out for future editing, you can simple “hide” them.
Click the controller to get the menu.
Select Tools -> Hide. (to hide them)
Or Tools -> Show. (to show them)
Waypoint controls
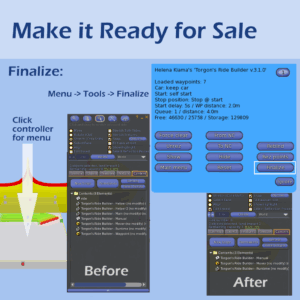
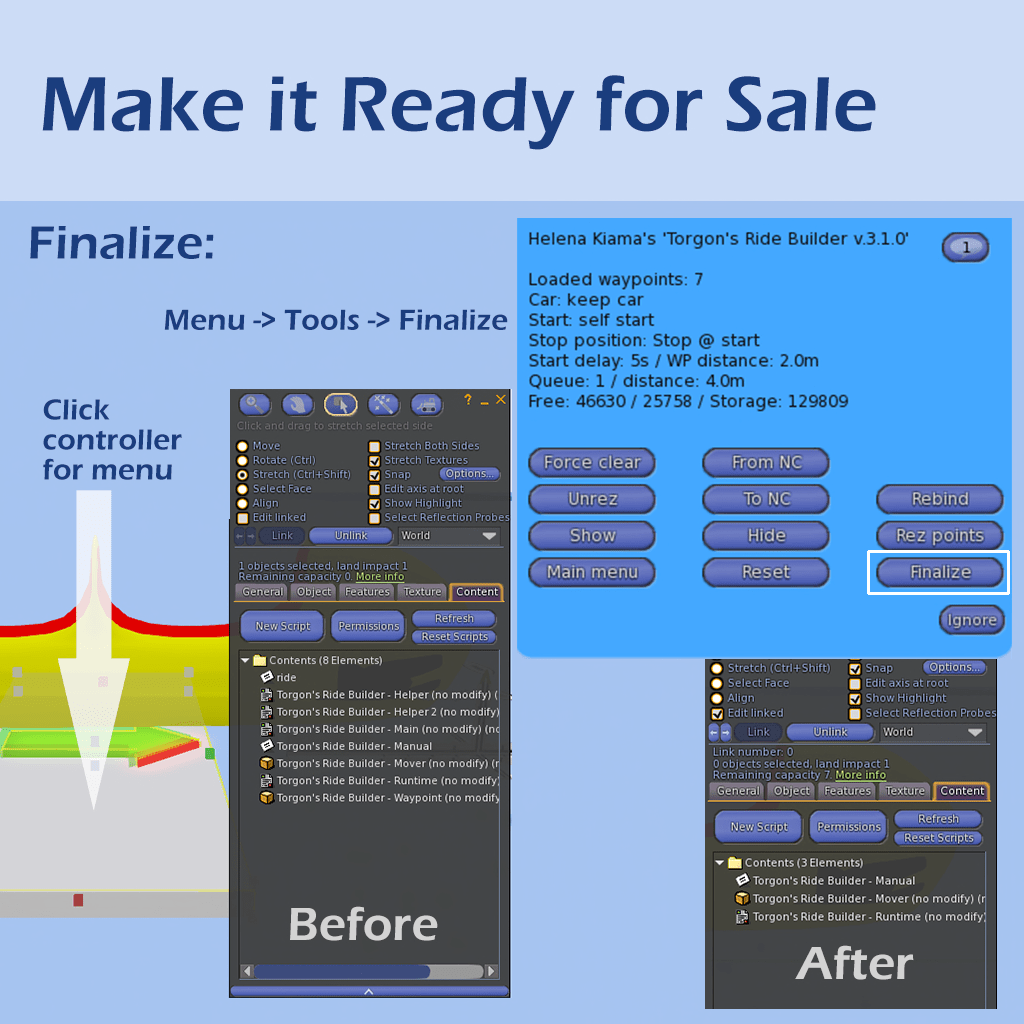
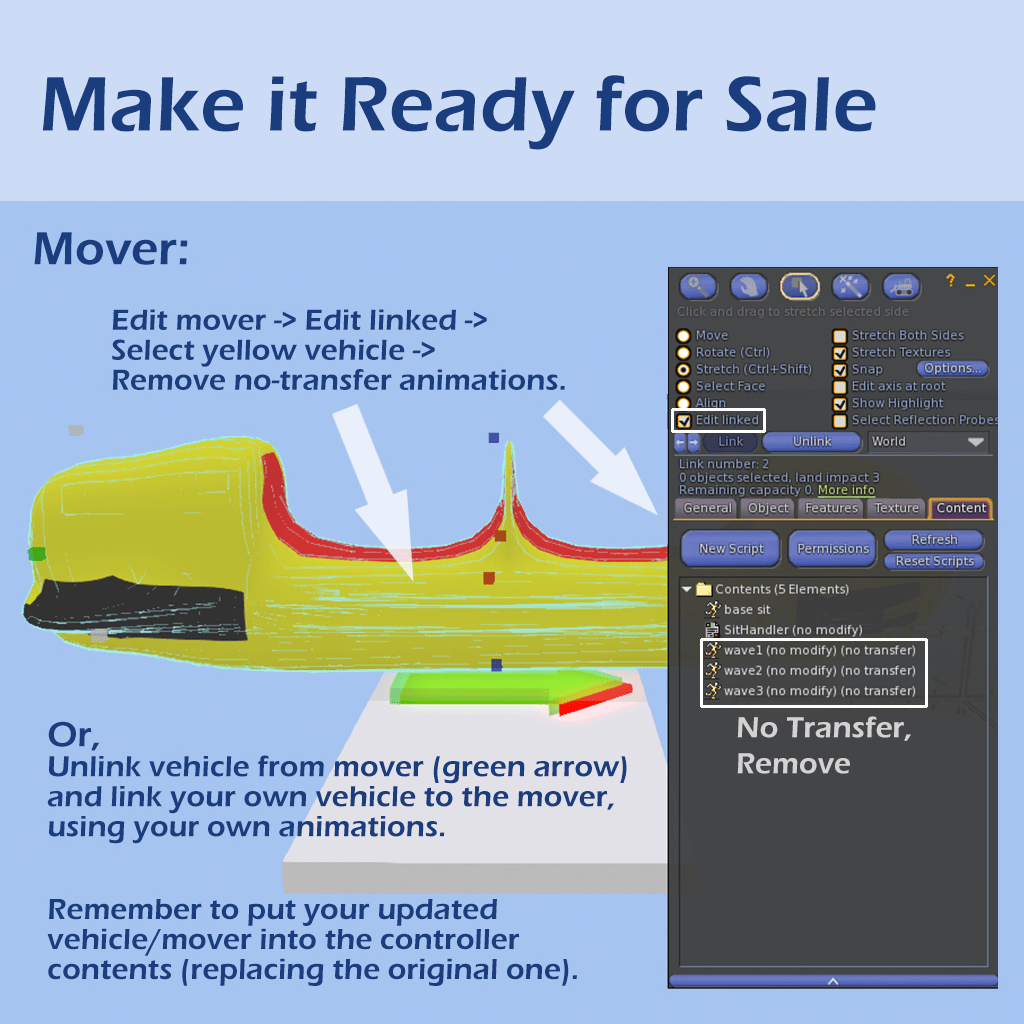
Make it ready for sale
(Full version only, this does not apply to the Demo version.)
Once you are done laying out your track you should take a copy of the controller for future editing.
Click the controller for the menu.
Select Tools -> Finalize. This tells the controller to clean itself up:
Removes the building scripts
Leaves the transferable runtime script.
NOTE: The ride vehicle is transferable, however, it contains no-transfer poses for waving! So it will not show as transferable until you remove or replace those.
Generally, its best if you replace the vehicle and 2nd seat and add your own by first unlinking the ride vehicle, removing everything but the green arrow, and adding your own vehicle and seat scripting.
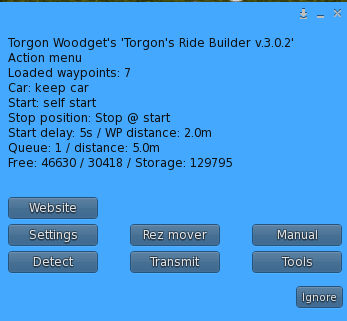
Main Menu
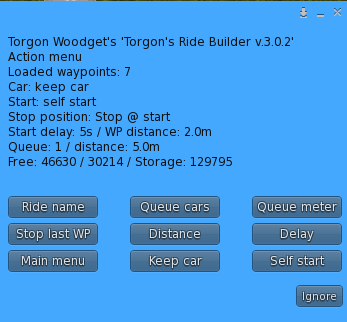
The Main Menu is the first menu that shows when you click the controller, and it’ll help you with several options to configure and build your ride.
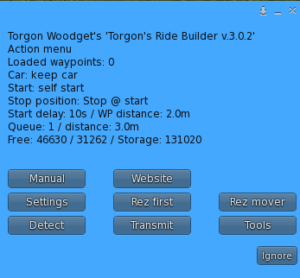
The Main Menu
This is the main menu as you will see it when you get the Ride Builder. Below, you’ll learn what each menu option means.
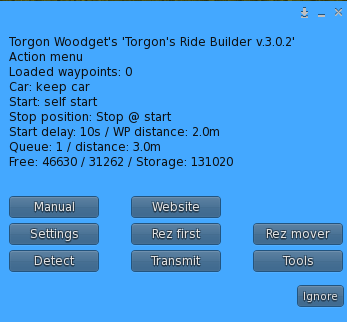
The Main Menu – after a reset
If you should reset the Controller using the Tools – Reset option it’ll clear out all waypoints, after which the menu looks slightly different, with one more option that is explained below.
Website
This button simply opens the website with the manual for the Ride Builder
Manual
The Controller contains the Ride Builder Manual as a notecard too, this button will give you a copy of that notecard.
Settings
Opens the Settings Menu, please see the different options below.
Only if you have a completely “empty” Ride Builder Controller, that means no stored waypoints, this option shows to allow you to quickly rez your first waypoint.
To get such an empty controller and remove the default waypoints that were initially loaded use the “Tools” – “Reset” function
On click, the controller will rez a first waypoint, two meters (or whatever distance you defined in the settings menu) from itself in arrow direction. After that, the menu option will disappear.
Rez Mover
This menu option rezzes the moving part of the Ride Builder, either the default one included, or one you made yourself. After rezzing, it’ll automatically update the Mover with the latest set of waypoints stored in the controller.
Detect
This option lets the Ride Builder detect and recalculate all the waypoints you placed into a path for the mover.
After clicking, you see a couple of messages similar to the following:


